If you are a regular reader of the blog or you have watched some videos on my YouTube Channel, you will know that I had no idea about how to make a hot tub when I built my own. This website and YouTube channel are the culmination of the knowledge that continues to grow on the subject.
When I built my tub, I was told by John my supplier that I was on the limit of a 3KW Spa Pack in terms of the size of the tub. I knew this from the outset. What I found was that on an average day over the 4.5 years I’ve been running it, the electrical heater can heat at a rate of about 0.5C an hour.
This means that impromptu dips are out of the question – you have to plan your usage. It is also quite a costly way to run things.
Running Costs
Before the price increase in April 2022, my Hot Tub was costing me roughly £50 ($75) a week to run. Not cheap I know but it is a luxury. Post April 2022 – that has risen to £100/$150 a week – ouch!
It also has no insulation as I didn’t think about that when I built it so it is pretty inefficient. Nothing I can change at this point but I can think about how I heat it.
With the price rises in April 2022 of fuel in general, and a subsequent increase planned for October 2022, I really needed a better way of doing things – certainly in terms of heating the tub.
After I helped my friend Paul install an Air Source Heat Pump on his tub, you can read about that here, and the numbers he was texting me for the heat up speed that he thought was not 2.5x and the cost which was roughly half on his smart meter this was on a 7KW heat pump – I just had to get one for my tub.

Renovation Time
They say things happen for a reason and as it happens, I was in the middle of a Control Room renovation when I had the lightbulb moment of “needing” an Air Source Heat Pump.

I woke up the morning after I had been chatting with my friend Paul and all I could think of was possible ways of adding an Air Source Heat Pump to my hot tub.
There simply had to be a way. The numbers were so compelling. If I could reduce the cost of heating my tub on a weekly basis, and speed up the heat up time, win win. This simply had to happen.
However, what I was 100% sure about was that I was not about to core new holes into the tub to get new plumbing in there. I needed to be creative.
Air Source Heat Pump Planning
The challenge one has with any renovation project rather than a new build is what is already in situ. My tub, doesn’t leak. So I am not about to drill holes in it. I’ve renovated a lot of the plumbing (apart from the control room) so I am not going to rip that out. Also, I have a nice western red cedar deck in place – this costs a fortune, even more so now timber prices have risen so there is no chance I am wrecking that.
This means that the planning and positioning of the air source heat pump needs to be a little creative on my part.
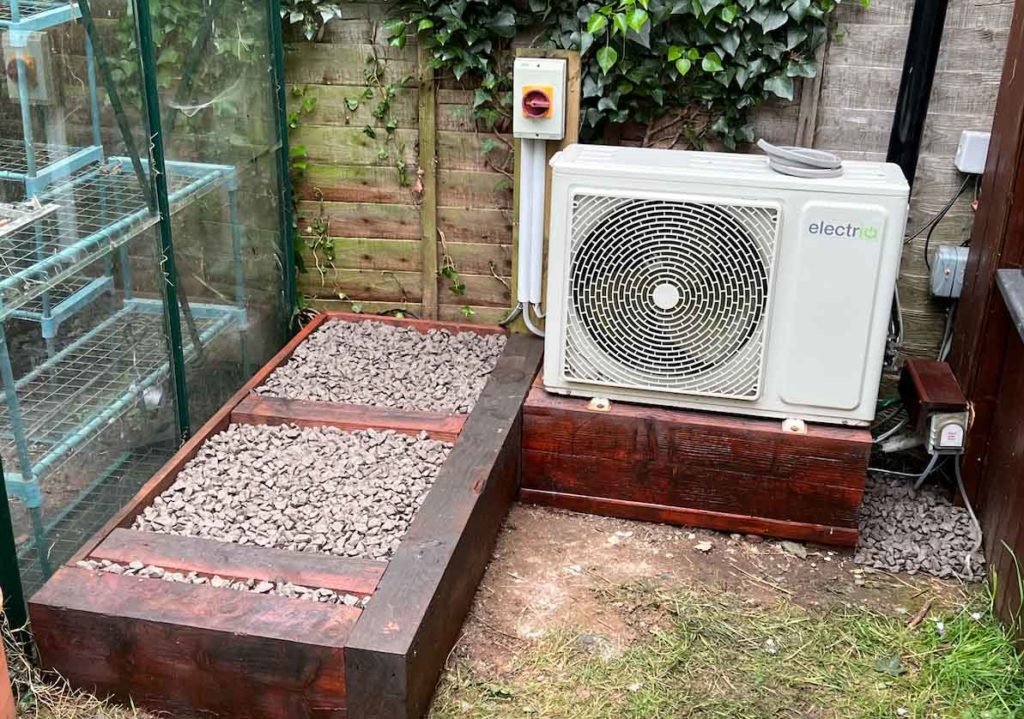
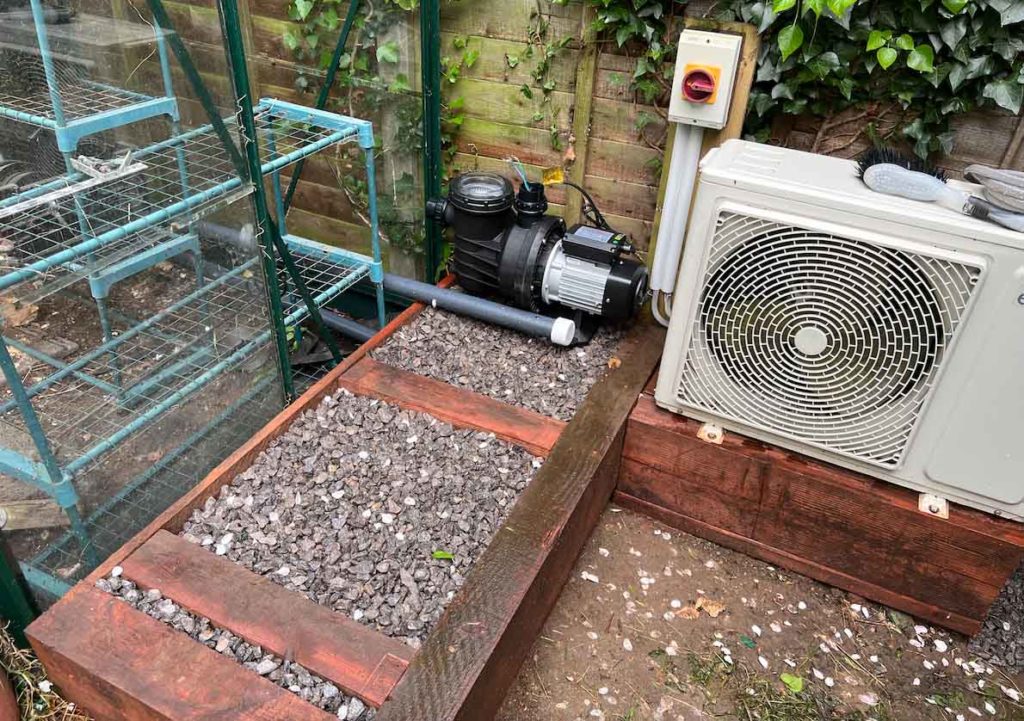
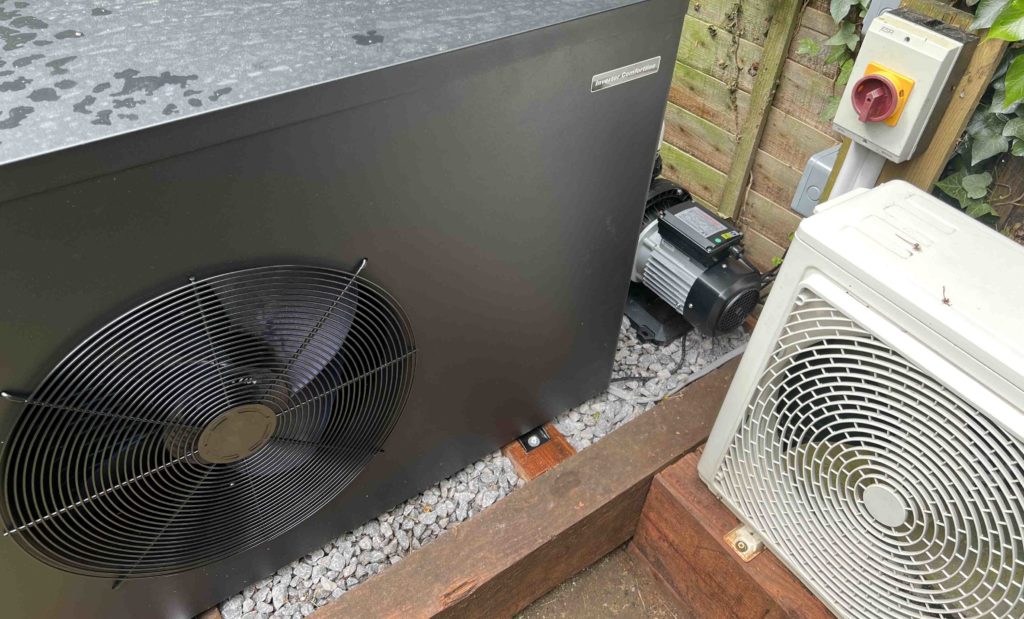
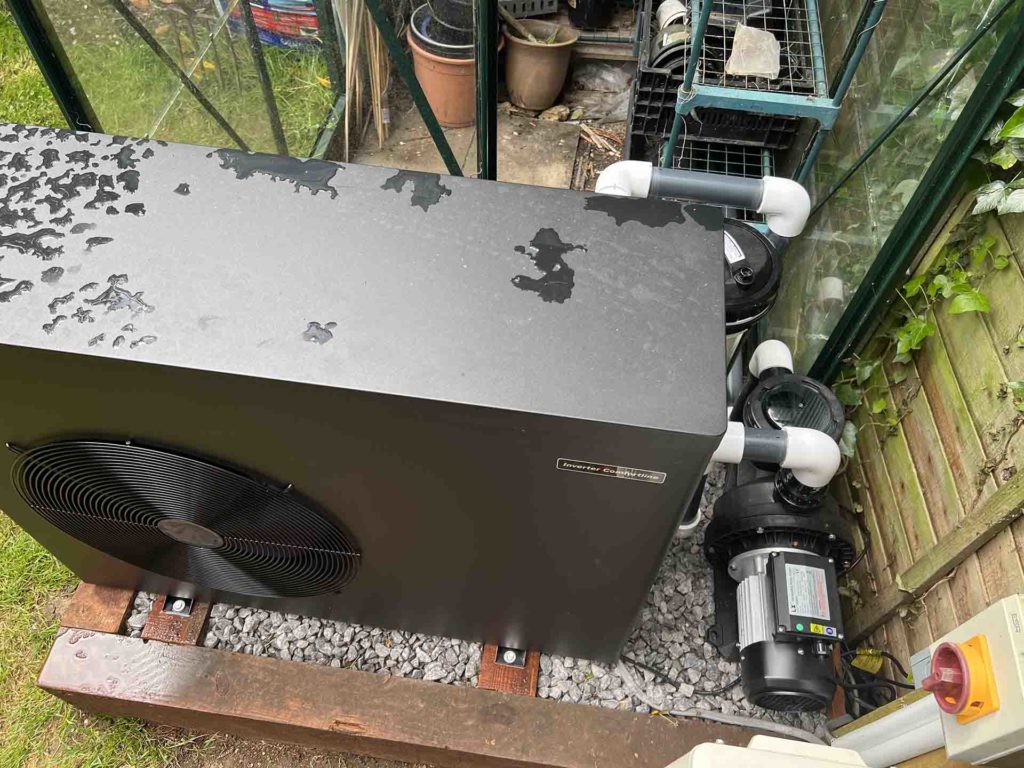
So, here goes. I am going to remodel a small area to the left of my office where I already have a portion of the air conditioning unit from my office. It is a bit of a mess so a renovation here is not a problem.
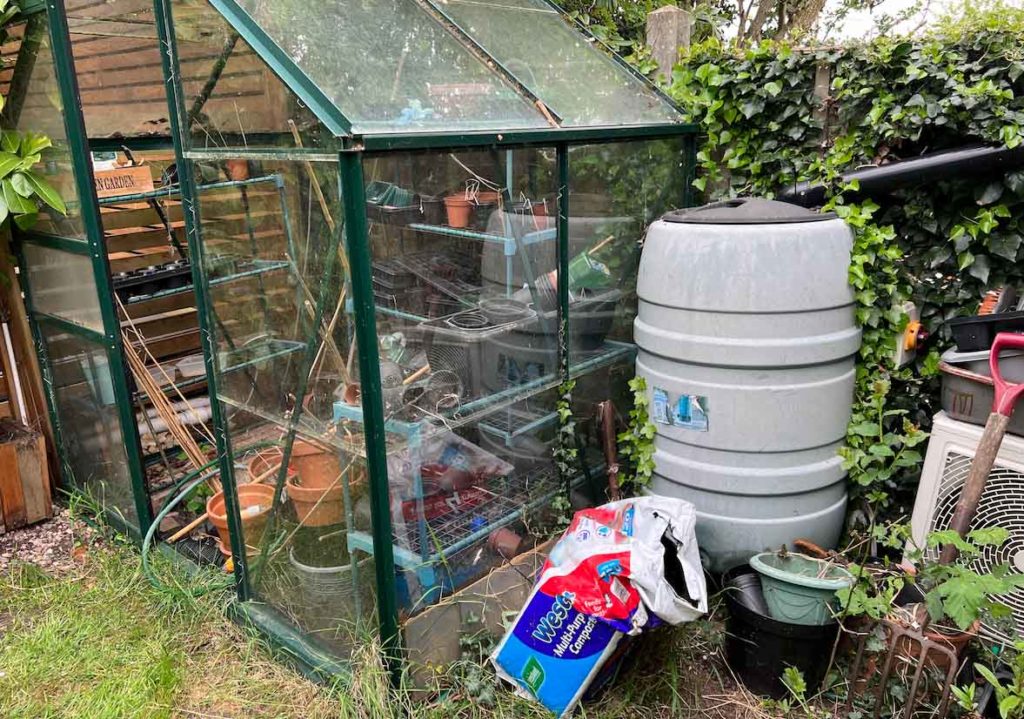
I am going to build a new plinth from wooden sleepers to keep in with the fitting of the rest of my garden rather than pouring a new concrete pad.
The Air Source Heat Pump is going to fit in the area, and the pipes are going to run through the greenhouse (I said I needed to be creative) which I hope will heat the greenhouse in the cooler months too.
Air Source Heat Pump Meets DIY Plumbing
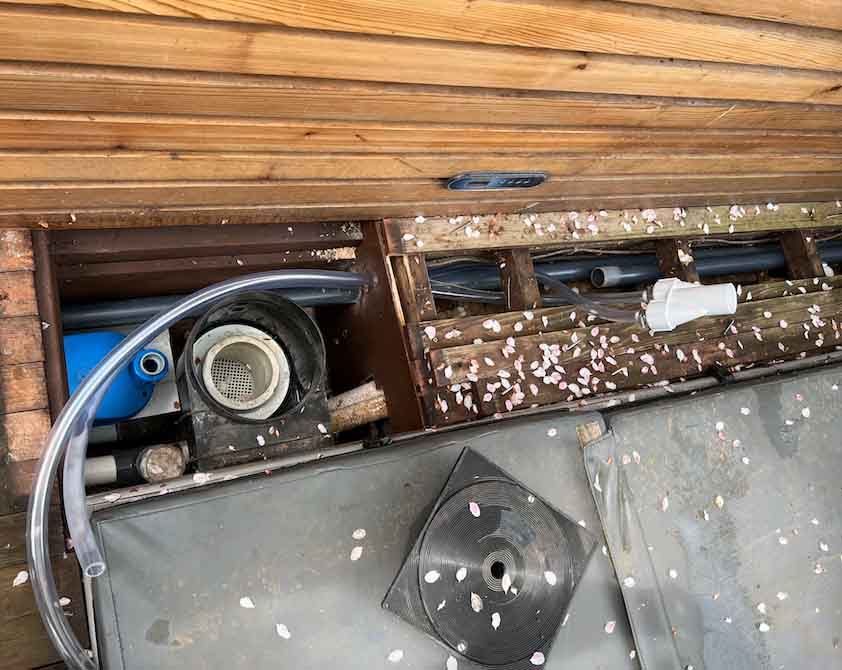
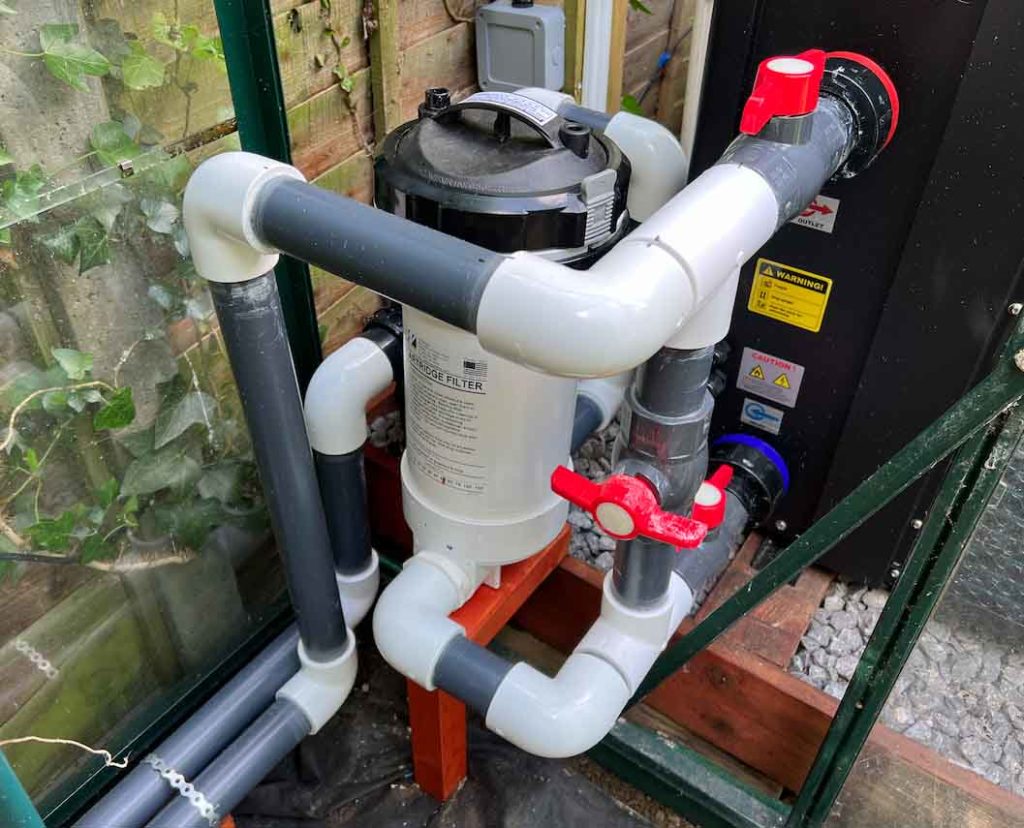
Now comes the “creative plumbing”. In general, pumps should have two lower drains on the suction side each. I am trying to move from a one pump system to a two pump system without the drilling of any new drains – just not possible.
So, I am going to be a little unconventional. I am going to have the skimmer and one suction drain on the dual speed pump. This will have the electric heater (which will be on a switch, firmly off for most of the time!). I am going to then take the second lower suction drain and use that just on the air source which will also have the filter on this plumbing loop.
I will be situating the heat pump above ground – there is no room in my control room so I need a self-priming above ground pump too. This is low HP, only 0.5HP (I went for this as there is about a 5m / 16ft run to and from the tub) plus a need for suction to self-prime. You can always dial down the flow if it is too great with a ball valve.
Conversely, it is difficult to increase the flow.
What I was also worried about was returning the hot water into the jet lines. If the 3HP jet pump is running it will work against the 0.5HP circulation (hot water) pump. Potentially, it could burn out – not what one wants.
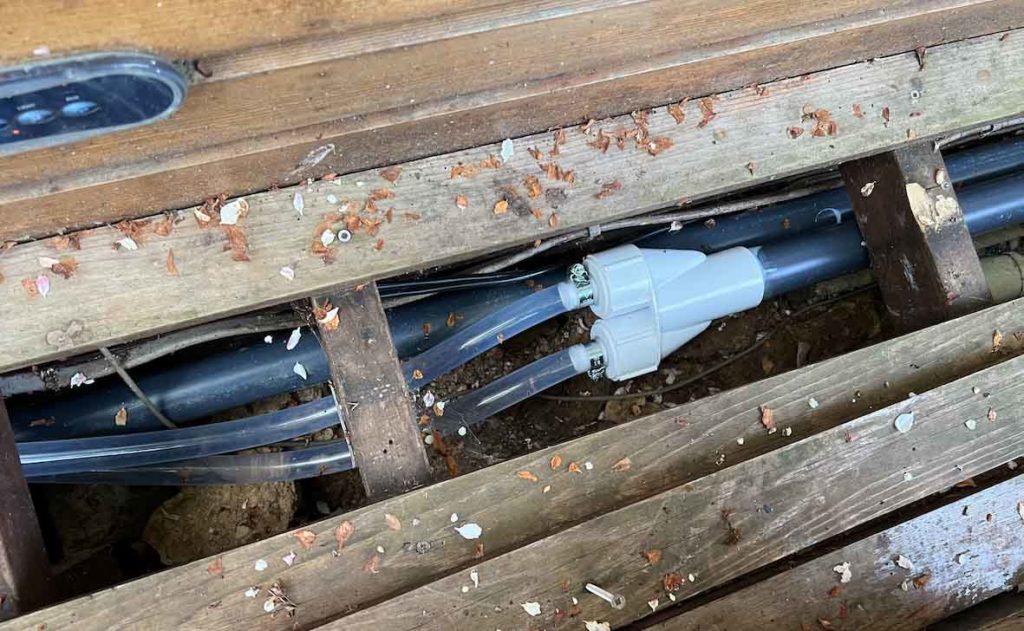
So, here comes the creative side of me. I decided that I would have two 3/8” returns into the back of the skimmer. The skimmer that I use in my builds is a Certikin HD100. They have two “knock outs” that you need to drill out in the back for water filling and overflow. These were previously not in use on my tub so I plan to use these to return the hot water.
They don’t fit perfectly so I will need to epoxy the back of them but it should be ok. Like I said, this is very much a DIY method. I would not do it this way with a new build or design. (A new build would have two lower drains and two swimming pool returns on the air source plumbing loop)
I can angle the flex pipes down essentially sending the new hot water straight into the dual speed pump via the base of the skimmer so it will get distributed accordingly. Bingo! New returns so no issues with flow – I hope!
I’m a DIYer who happens to help people with their own builds. This is the kind of “bending the rules” that I thrive on – absolutely love it.
DIY Air Source Heat Pump Electrics
I love the planning stages of any project, especially the electrics. With an electronics background, this is the part that really resonates well with me.
With the setup that I am going for I have somewhat of a unique challenge. Knowing from my original build how overloading a spa pack gets expensive in $300 PCB boards when you melt them, I did not want to do that AGAIN!
So, I am going to put together a relay system to control the new circulation pump I have already spoken about.
There is a little bit of a challenge in that the pump will not be plugged into the spa pack. What I am going to do it run the pump off its own circuit and control its operation using relays.
I need two relays for this as I have a dual speed pump. Basically, I want my new circulation pump to be switched on whenever either the low or high speed is running on the pump. The thermostat in the Air Source Heat Pump will do its job and only kick in if it is needed.
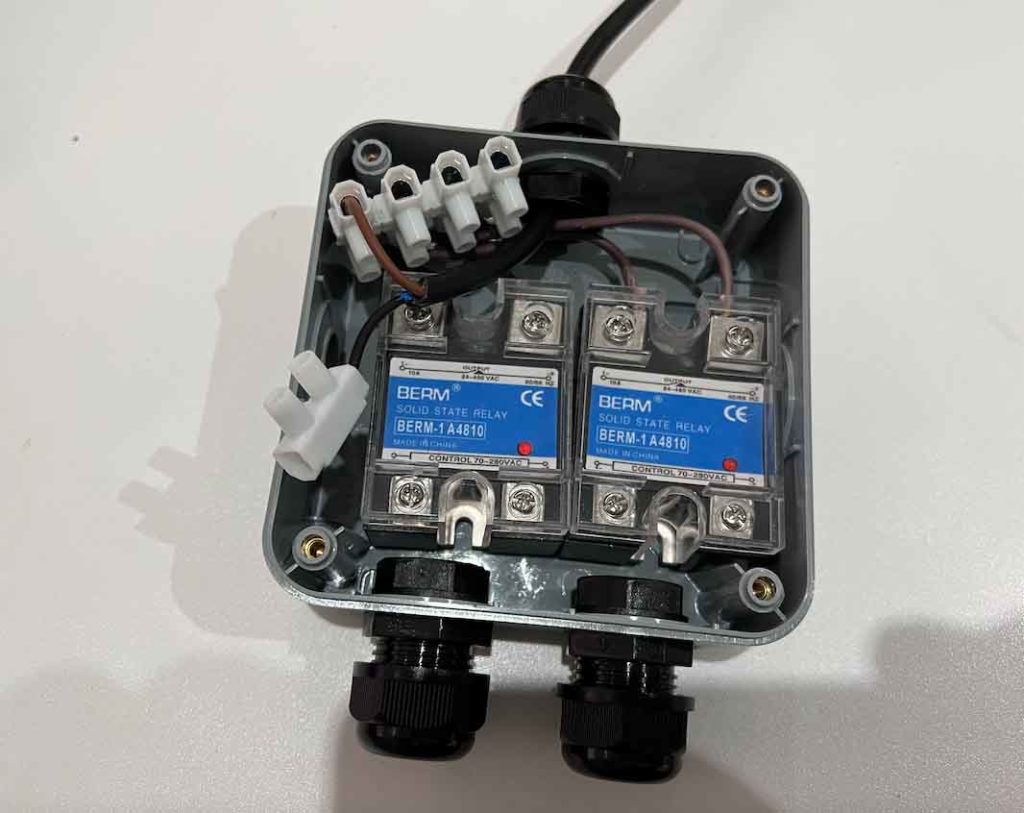
That way, I know I will be getting heat on both the high and the low speeds of my pump. The “problem” is that a dual speed pump has two lives (hot) and one neutral. High and low Speed live plus a neutral. I can’t connect them together though one relay as I would be supplying two lots of power to the pump which is not going to end well. How it would end I am not sure but I’m not going find out!
So I will have the two relays that have a common goal – turn on the new circulation pump on the air source. If the pump (my dual speed) is on in either low or high speed, either one of the relays will be turning the circulation pump on. If the water is not up to temperature, then the air source (after 3 mins) will kick in and provide heat.
Bingo!
The New Circulation Pump
As the new circulation pump is not connected to the spa pack, it needs to have its own power. As you have seen above, I will control it manually with a relay system. I will also put in place a switch so that it can be physically turned off if I need it off.
I will take a power feed from the main block on the air source heat pump. This is being powered off my main hot tub circuit that runs on 10mm3 cable and has plenty of current available.
There is a rotary breaker that I have looped into so that I can turn off an isolate my air source heat pump as well as all the hot tub parts with one turn of the dial. Perfect!
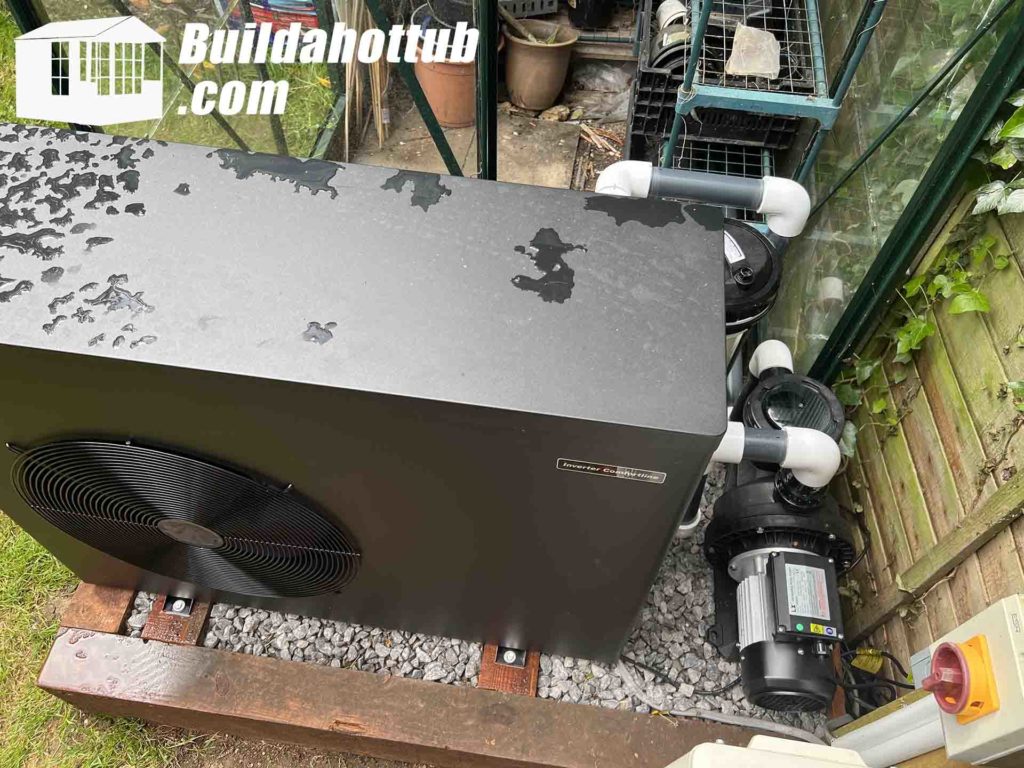
The Air Source Heat Pump
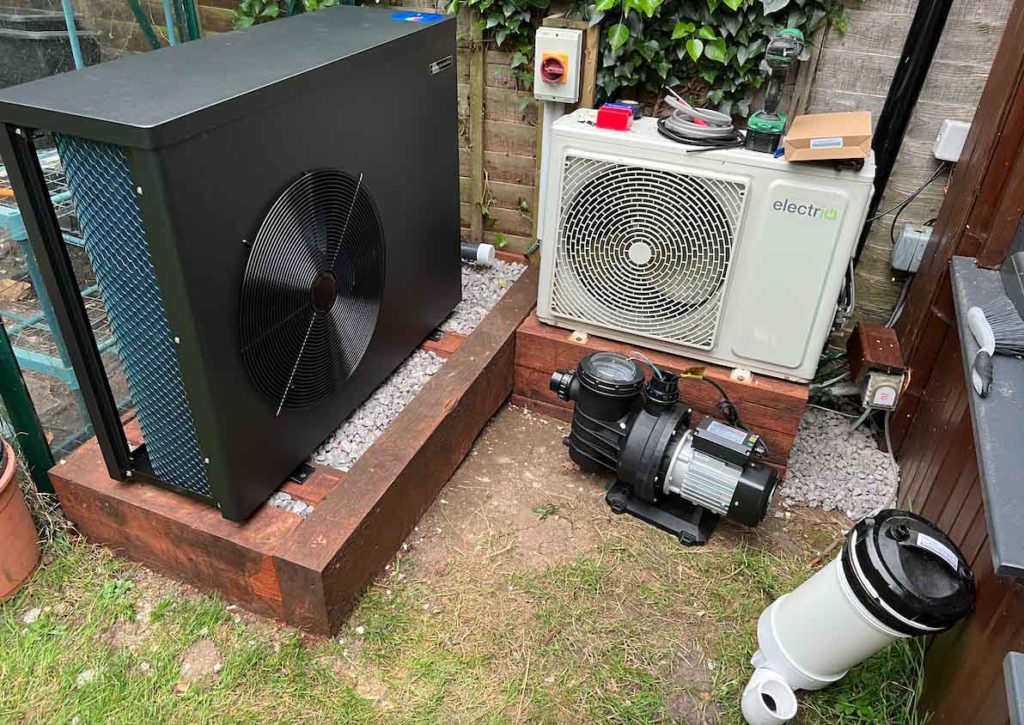
The Air Source Heat Pump that I have gone with for my tub is one of the cheaper models out there from Comfortline.
It is fully inverted and the average COP from the specs is around 6 with highs of 10. This means that for every KW I put into the unit, I am getting 6KW outs on average. Sounds good to me. There are models out there that advertise much more than this, but weighing up the costs, I decided that I would take the economic route that most of my customers would take themselves. It was also the same range that I put into m
From the specifications, I could not see how any of the fancy features like WIFI or being able to operate down to -15C was going to help me.
I did however go for a large one. If I was going to take the time to install one of these, I wanted not only my running costs to drop, I wanted the heat up times to increase. So, I decided I would go with a 21KW Air Source Heat Pump – that is 7X the power of my electrical heater!
Testing
I always have a certain level of apprehension when it comes to testing some new plumbing. So, what I planned to do on this hot tub renovation project was to test things in stages.
Firstly, the regular fill. I filled the tub and checked for leaks. I did have a leak, albeit a small one at the bottom of the skimmer. This was still on old plumbing as I had no way to get to this.
Some epoxy paste followed swiftly by encasing it in a waterproof concrete mix put pay to that small leak. It was very insignificant but I wanted to deal with it anyway. I am guessing it has been there for some time as it would have been underneath the old control room floor so I had no way of knowing it was there.
Next, was to fire up the pump on the “old circulation” system and check for leaks. A small turn of the union nut and I was good to go. I left it running on low for a few minutes whilst I checked the plumbing for leaks. So far so good.
Next stage was to check on high speed. All working great. Next, I took a look at the relay system that I had put in place. Nothing was plugged in for switching at this stage, I was just checking it was getting power and actually switching each of the relays on. Again, all tested positive.
Knowing that I had the tub and what I will call pump 1 (the original dual speed) working, it was time to turn my attention to the air source heat pump and pump 2. I needed to finish the plumbing before I can do anything more.
Wiring in the new pump, relay box and Air Source
After stripping the heads of two, yes two screws on my new air source heat pump, I was calling the manufacturer all sorts! They had tightened the screws so tight, I simply could not get them out.
About an hour and a half later, one screw being cut out, I managed to wire in the three cords which should have been a 10 minute job at best.
The Results
The first result is it works and it works perfectly. Super happy with the result. The next benefit is the heat up time. I have managed to move to a heat up time that is not 8X faster. Yes, you read that correct, 8X. I am getting 4C an hour heat up at 15C ambient temperature. It was a warm day yesterday and it put out even more than this.
Honestly, I could not be happier with the result.
I am going to do a follow up post on how much money this is saving on electricity – initial indications are more than 50%! Exciting.
Happy Hot Tubbin’
Can I help you with the supply or with the plumbing design of adding an air source heat pump to your hot tub? If so, then get in touch below and I will be more than happy to help.
looking for hot tub & pool parts?
I have everything you need....
If you are looking for Hot Tub & Swimming Pool Parts, either for your DIY Hot Tub, plunge pool or swim spa build, or you are looking for parts to repair your pool or hot tub - then check out my USA & UK stores below.
I carry 30K+ product lines across the stores
![]()
Can I Help You?
If I can help you in any way I would love to hear from you. You can get in touch using the form below.
Thanks - Andi
 Hi, Andi here. I own Buildahottub.com and also write all of the articles and info pages on the site. Some years back now, I built my own hot tub but struggled to find the information I needed. So, once my tub was complete, I started this website to help others in their own pursuit of hot tub and plunge pools DIY building information.
Fast forward to 2025, I've helped over 1400+ DIY customers just like you all over the world build hot tubs and pools. Have a good look around the site, there are lots of resources here. Please do get in touch if I can help you. - Cheers, Andi

What I’d Change If I Built My DIY Hot Tub Again
Around eight years ago, I built my own DIY hot tub. You've probably seen it [...]
May
Out With the Cedar, In With an ICF Inground Hot Tub
Right, I've got a brand new project to introduce to the channel today – and [...]
Apr
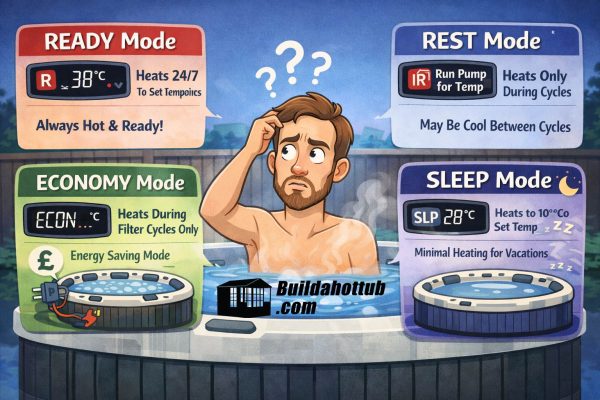
Balboa Heat Modes Explained: Ready, Rest, Economy and Sleep — What They Actually Mean
If you've got a Balboa-controlled hot tub and you're not sure what all those heating [...]
Mar
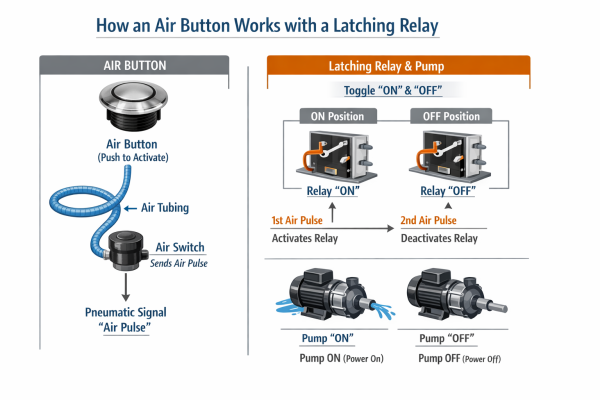
How to Change an Air Button and Latching Relay on a Hot Tub, Pool or Spa Bath
If you've got an air button that's stopped working, or a latching relay that's given [...]
Mar

How to Choose the Right Air Source Heat Pump for Your Hot Tub or Pool
With so many air source heat pumps on the market right now, choosing the right [...]
Mar
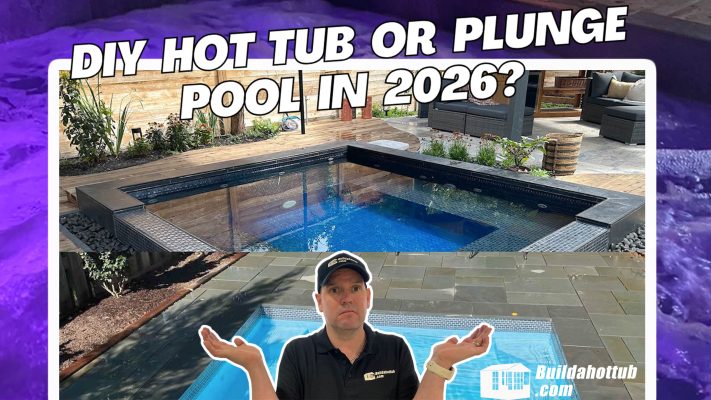
Hot Tub vs Plunge Pool – Which Should You Build in 2026?
Right, this is one of those questions that lands in my inbox on an almost [...]
Mar
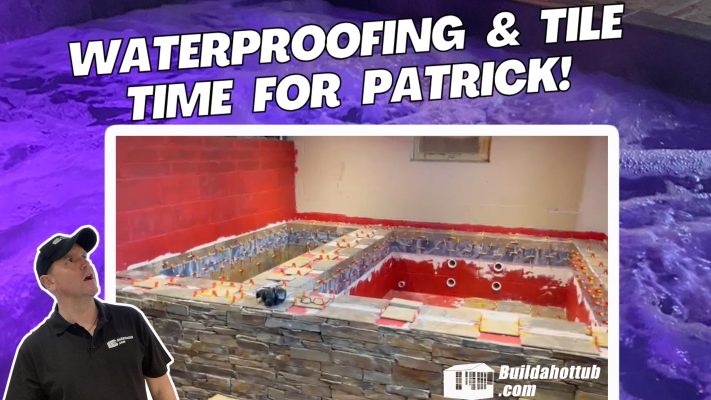
Patrick’s Wisconsin Basement Hot Tub & Cold Plunge – Waterproofing, Tiling & a Surprise Water Feature!
We're back with another update from Patrick in Wisconsin, and this one is a big [...]
Feb
Key Considerations for Building a DIY Hot Tub in 2026
So, you're thinking about building a DIY hot tub in 2026? Well, you've come to [...]
Feb