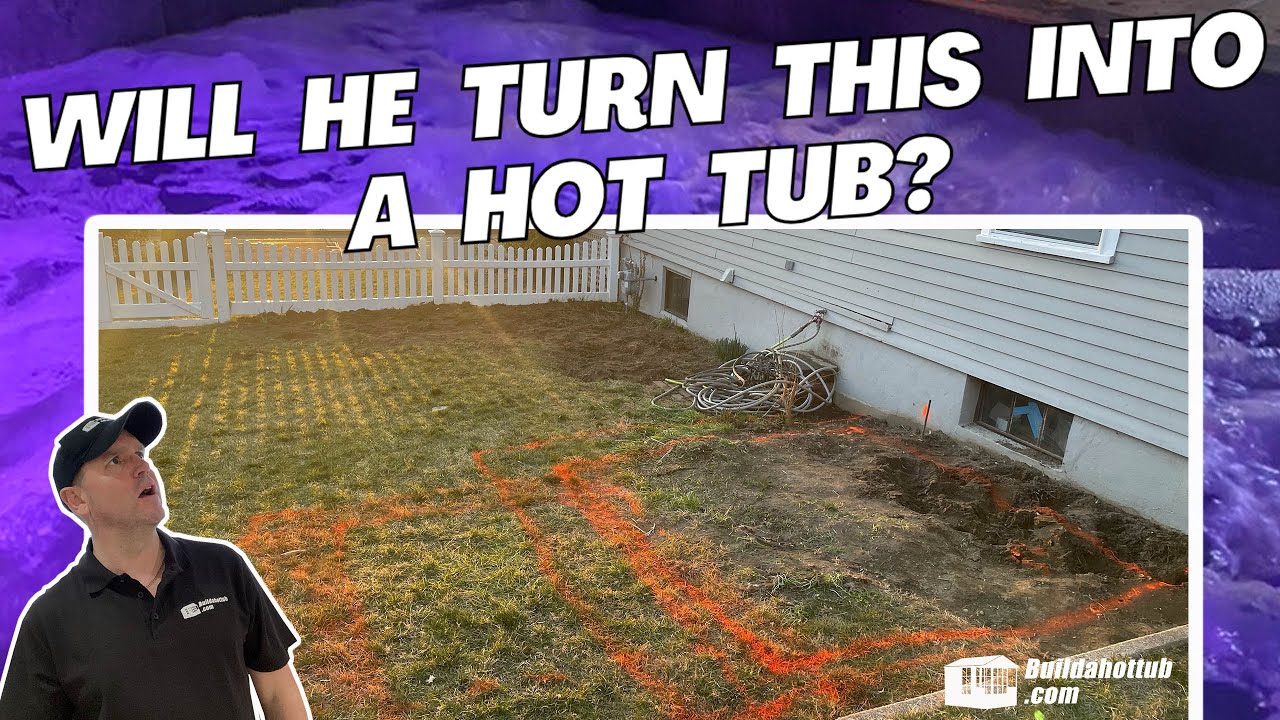
Today, I’m thrilled to share the DIY hot tub journey of Paul from New York. His project is a testament to how determination, family teamwork, and the right guidance can transform a dream into reality.
This is also one of my favourite types of builds because you get to see the progress from the first idea to a ready to go Hot tub. Let’s dive into Paul’s story and discover how he built his custom hot tub from scratch!
You can also find me on my socials;


The Beginning: Turning a Dream into Reality
Paul reached out to me in September 2023 via the build a hot tub contact page. with a clear vision: he wanted a DIY hot tub that would integrate seamlessly with his new home heating system. While he knew what he wanted, he wasn’t sure how to achieve it—that’s where I came in.
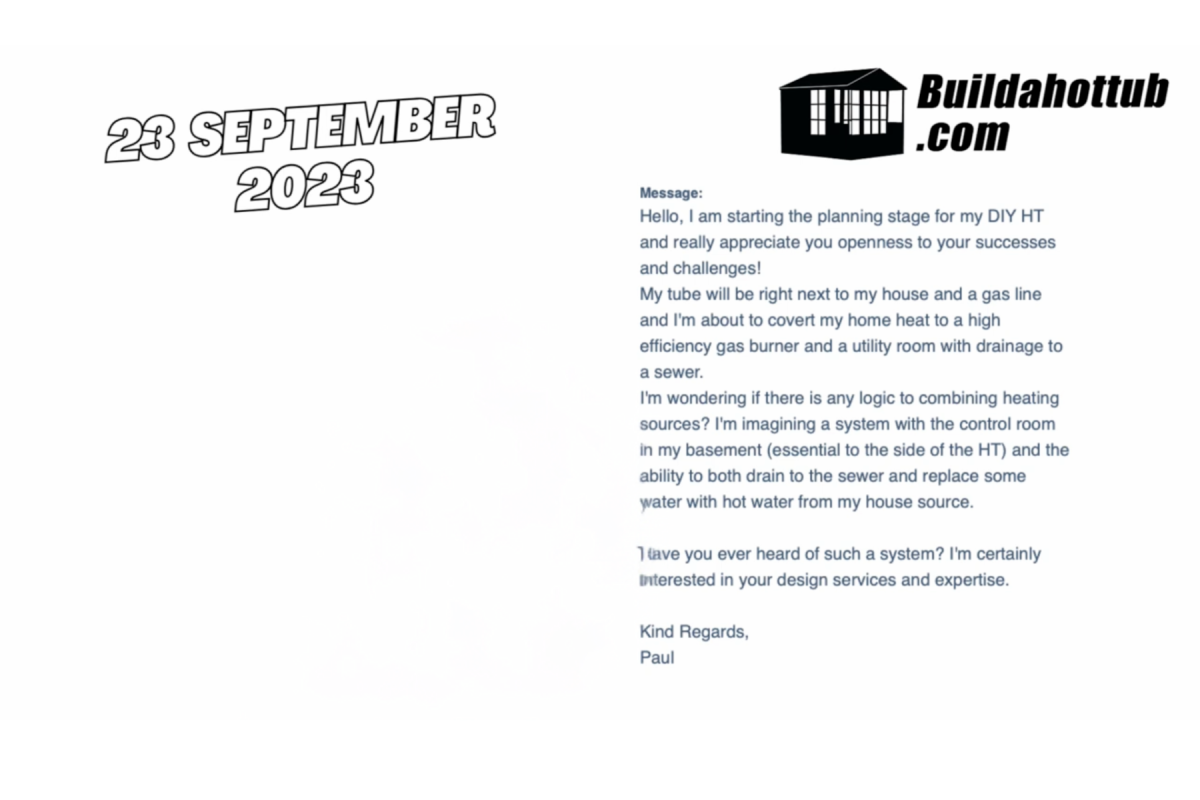
With projects like these, getting an idea ready on paper with proper technical designs takes time. So after some emails, Zoom calls, and making some refinements, I delivered a custom plan for Paul in February 2024.
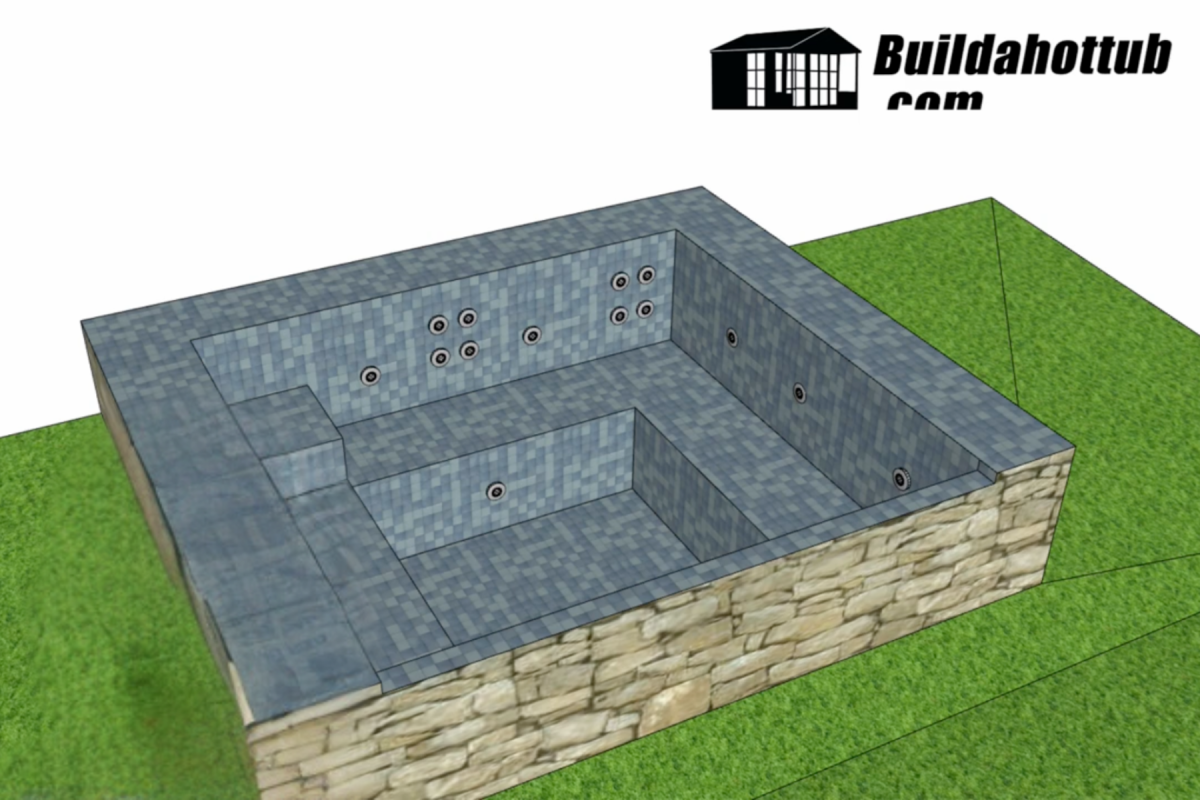
Paul’s design featured:
- Multiple seating heights for family comfort.
- Custom jet placements for optimal relaxation.
- A heat exchanger to maximize his home’s heating system efficiency.
The design process wrapped up in March 2024, and by late April, Paul was ready to break ground.
The Build
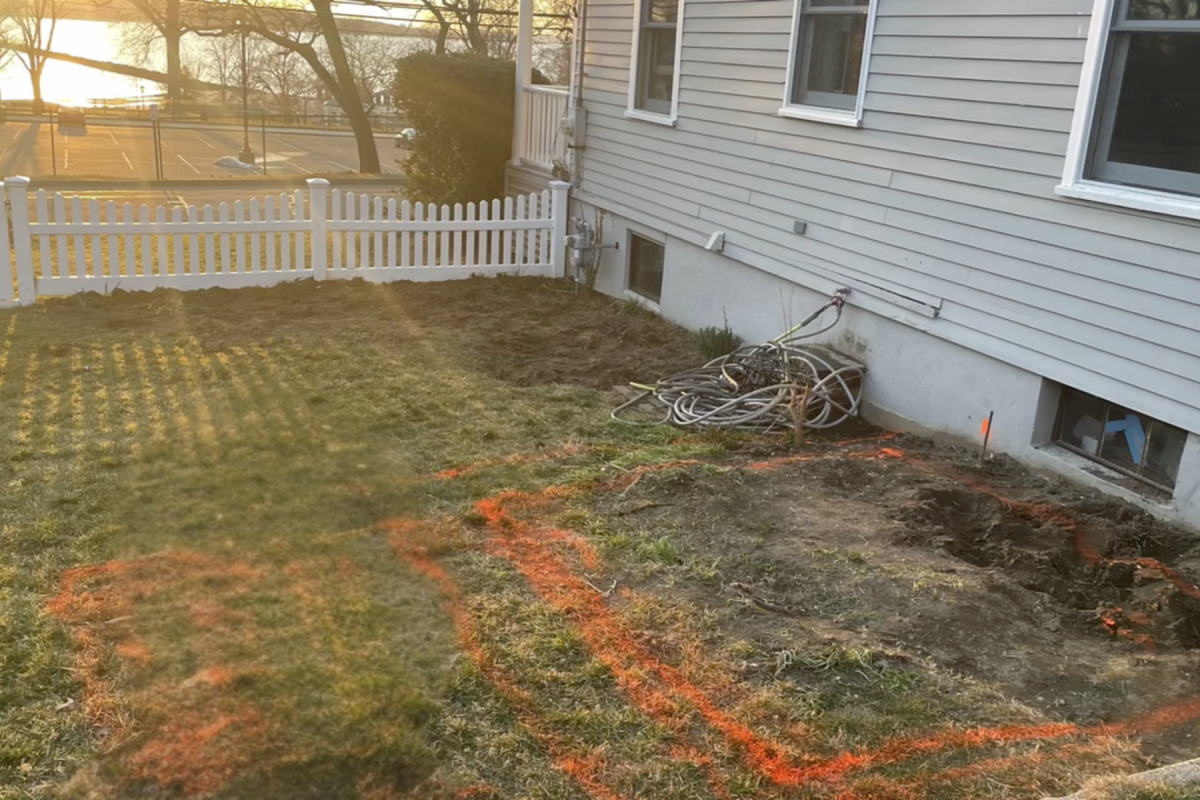
After getting his kit from my shop, Paul began transforming his backyard by marking out the hot tub area. His control room was planned for the basement, with pipes running discreetly through the basement window. This layout kept the heat exchanger, spa pack, filter, and pumps hidden yet accessible.
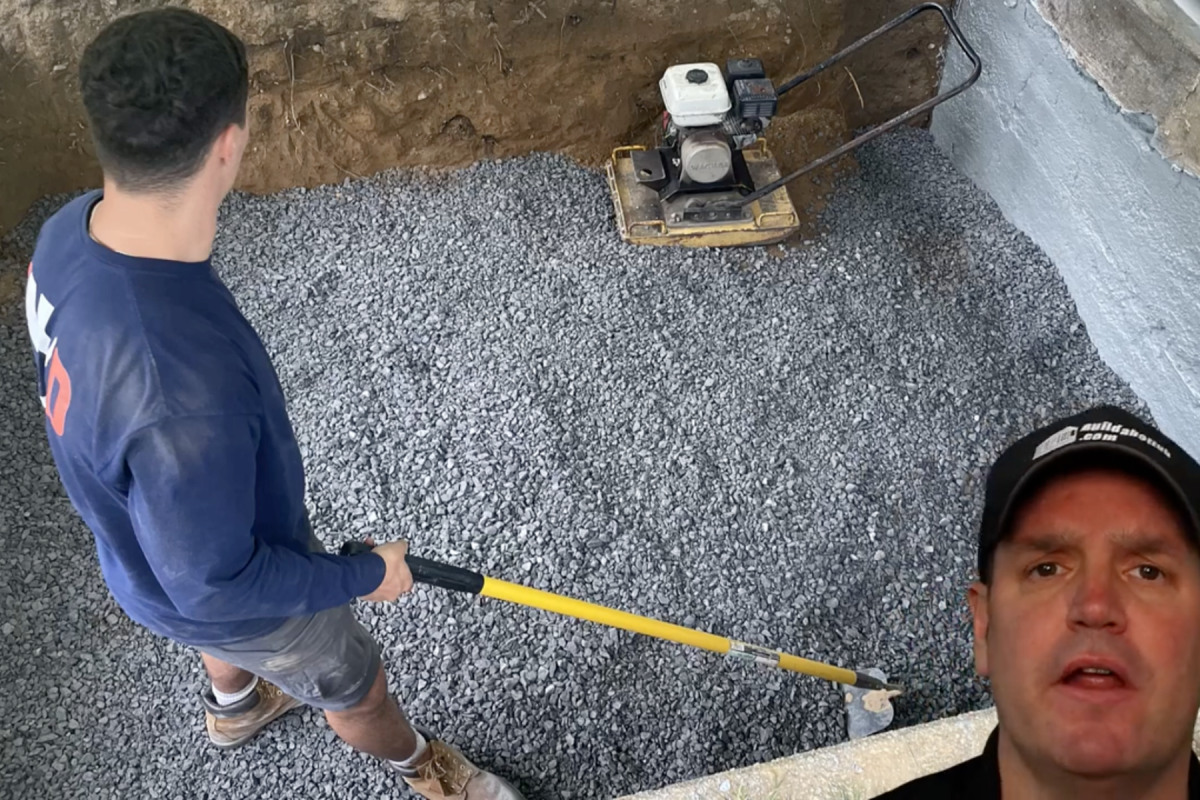
The first step was digging—a task Paul tackled with the help of his sons. It became a bonding experience as the family worked together to:
- Lay and compact a gravel base.
- Add insulation beneath the slab (optional but preferred).
- Pour a concrete foundation.
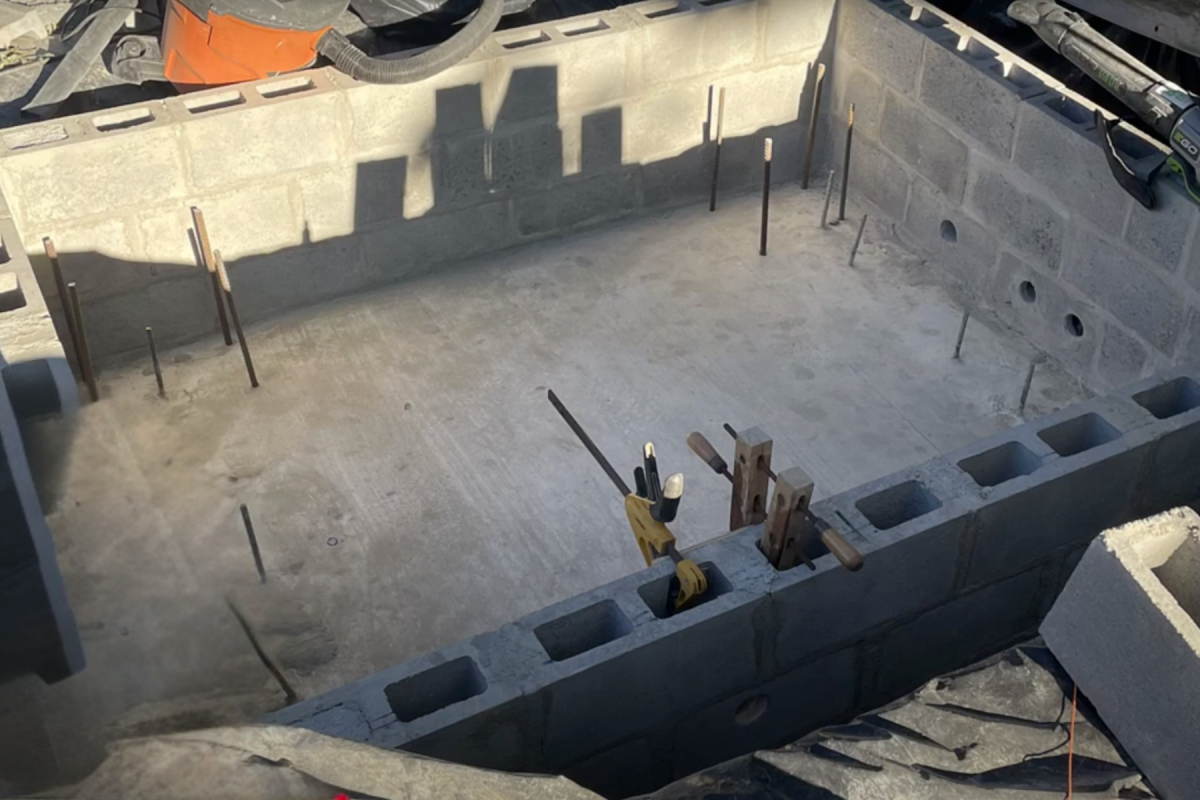
Next came constructing the walls with hollow CMU blocks. These blocks, reinforced with rebar and concrete, were sturdy and budget-friendly.
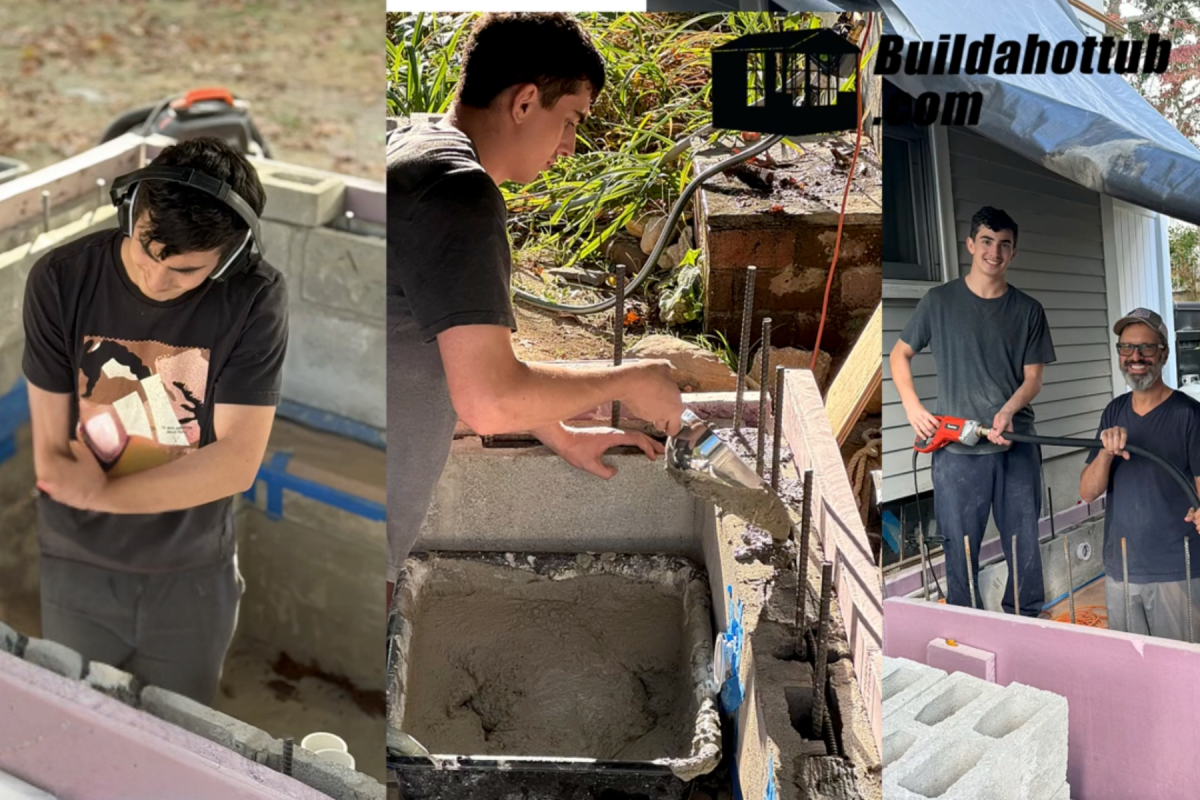
A Family Affair
One thing that stuck out in this build was Paul’s family’s enthusiasm and participation in this project. All his sons were onboard and hands on during this project.
This makes it all the more special because they all not only get to build something that they will all use but also create some incredible memories together.
Challenges Along the Way
Like any DIY project, this one came with challenges. At one point, Paul nearly opted for a pre-made shell, but with some encouragement, he persevered. Time constraints proved tough, but the family pressed on.
A side note here. While hot tub builds tend to be dream projects, it does take a lot of effort and perseverance to get your dream come to life. I can’t stress how important it is that you keep persevering no matter how impossible the project might seem.
Waterproofing
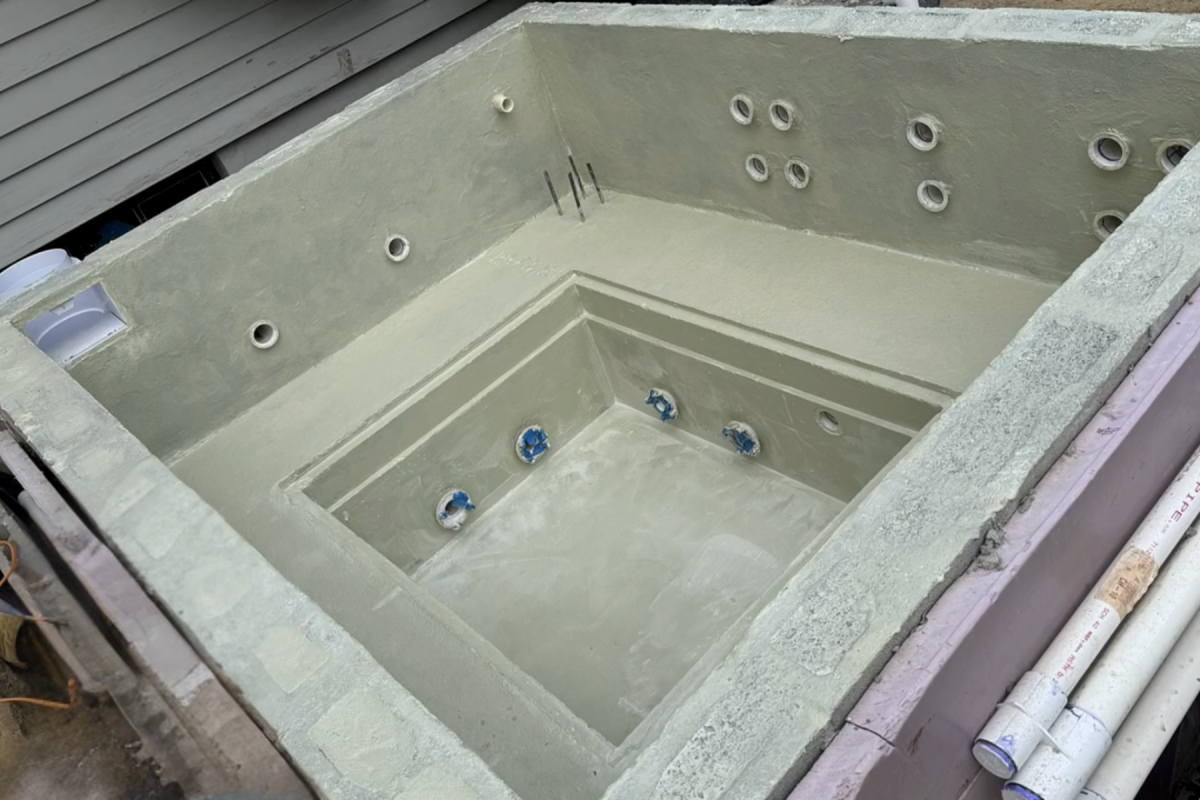
Once the walls were complete, the surface needed rendering to create a smooth finish. After curing, a waterproofing layer was applied. In the U.S., my go-to material is the Hydro Ban Cementitious Waterproofing Membrane by LREE, while in Europe, I recommend Ardex S7 Plus by Odex. This step was crucial to ensure the tub could hold water effectively.
The Exterior
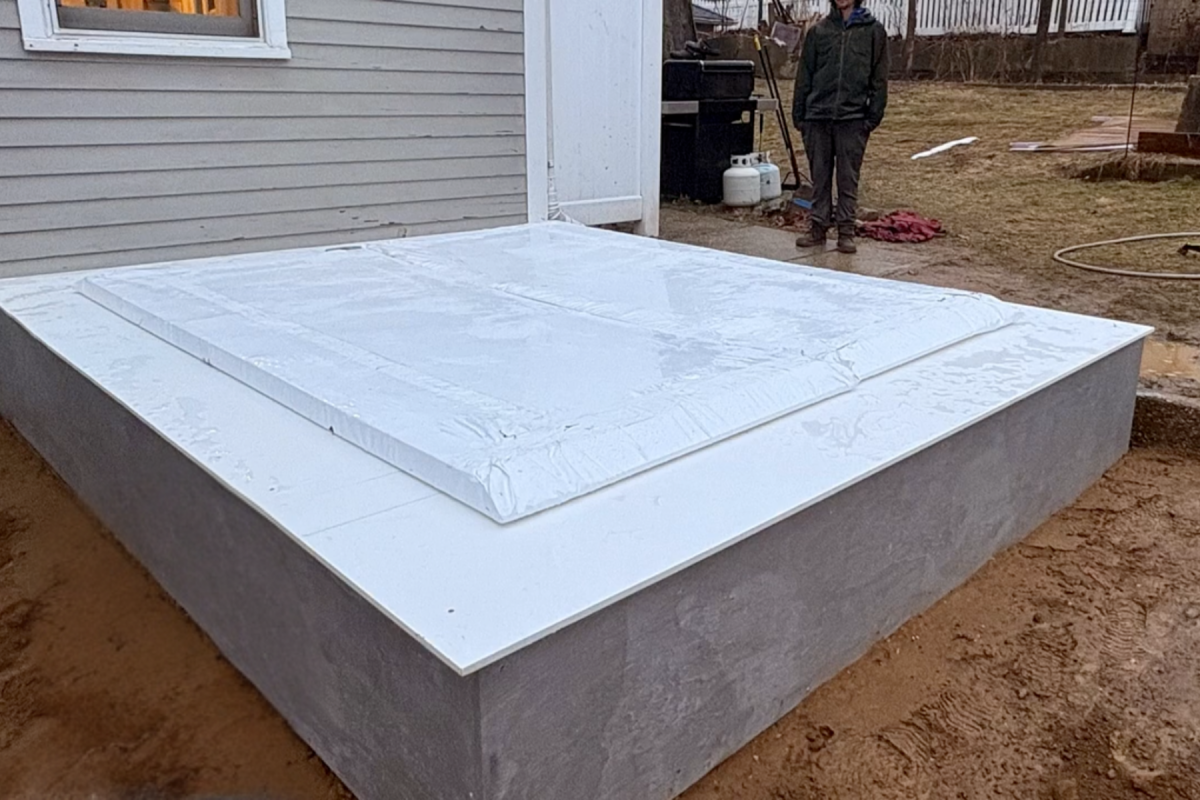
The tub’s exterior featured a block cavity design, with plumbing neatly hidden. this involce having your inner layer of block with the plumbing clad around it. Then an exterior wall is build sandwiching the plumbing in between ensuring its well hidden. this can be seen in the image below.
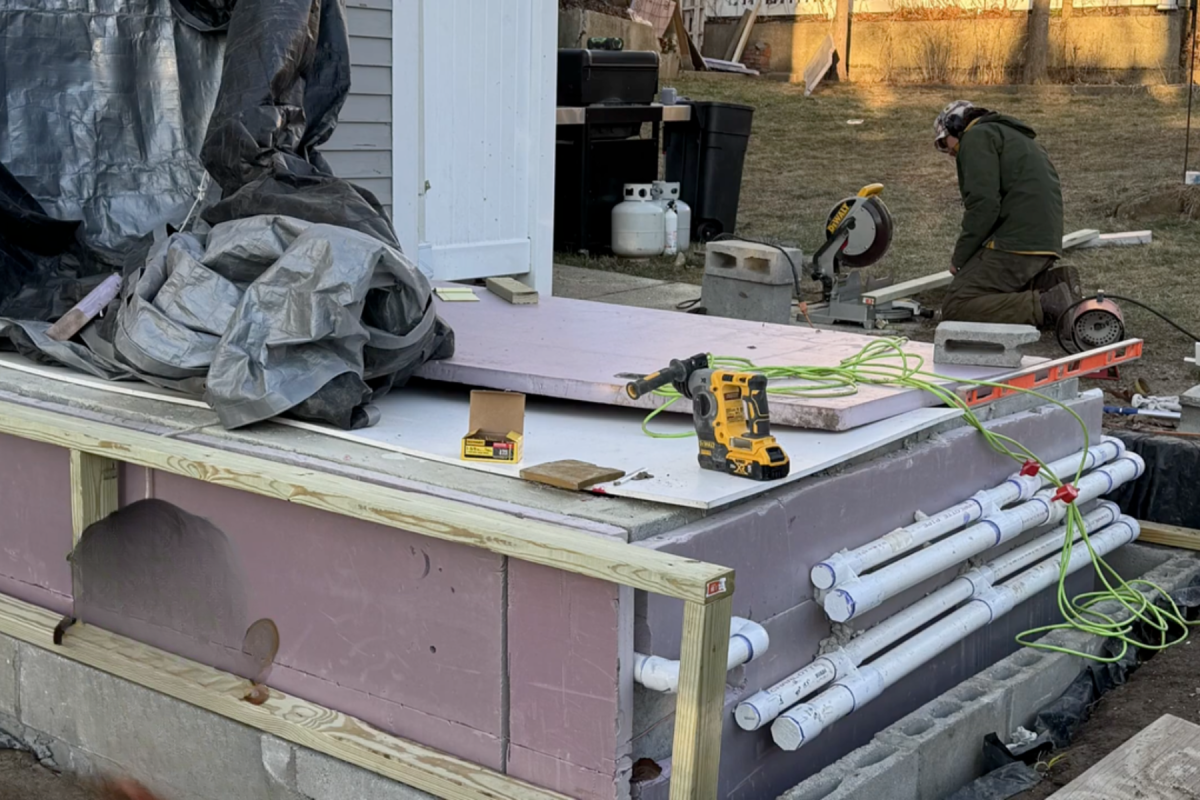
One this was complete, it looks like what’s shown in the image below. Here, Paul and his sons added a temporary cover of insulation wrapped in polyene to protect against rain and humidity until the project’s completion.
The Control Room
While the work on the exterior progressed, they simultaneously started working on the control room.
When Paul got in touch with me, he wanted his control room to be located in the basement and sent me this picture to show what is looks like.

Once Paul and his sons were done with installing all the relevant components, this is what the control room ended up looking like. What a beauty.
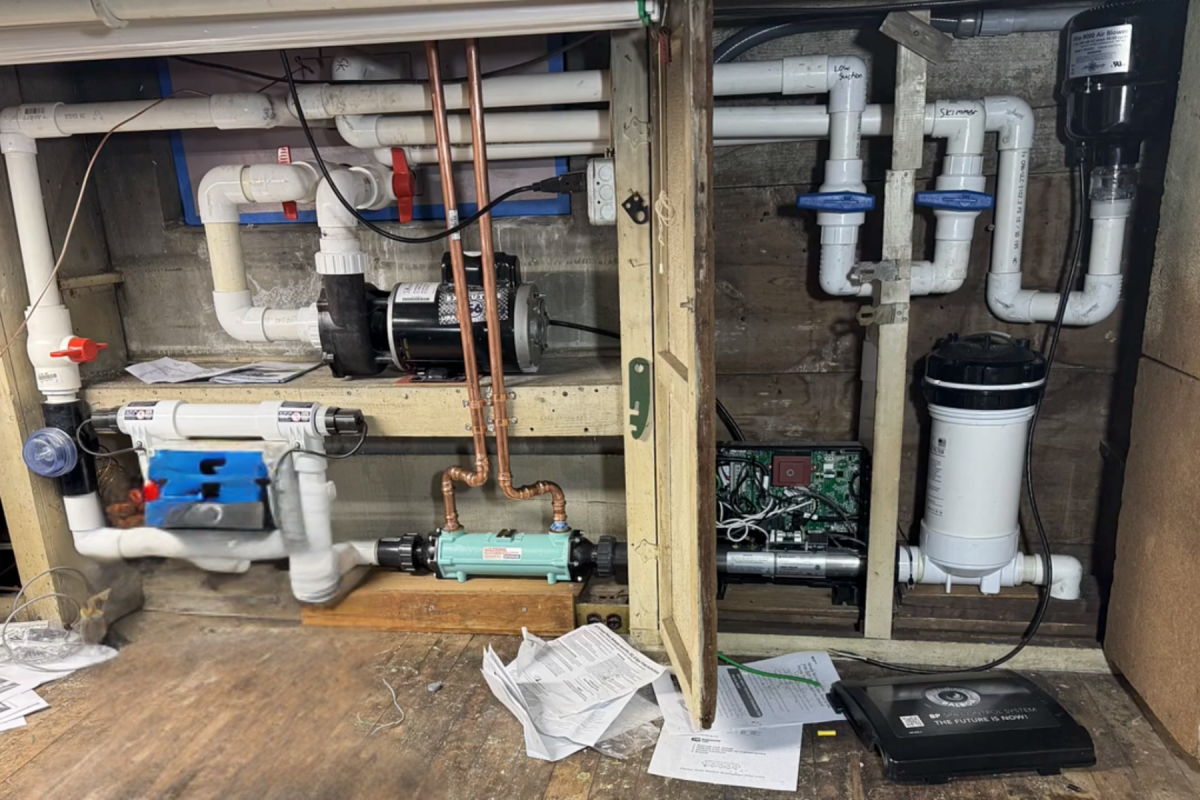
As we can see, we’ve got the filtration, the circulation pumps, jets pumps etc which are pretty obvious. However, in the center we’ve got the heat exchanger that Paul had planned
The heat exchanger uses water from Paul’s home heating system to warm the tub. Heating water flows around the heat exchanger’s plates, while the tub water runs through its center, efficiently absorbing heat. Electrovalves regulate the system, stopping the heating water flow once the desired temperature is reached.
Paul also installed a UV system to minimize chemical use. While he may upgrade it, the current setup effectively reduces chlorine and bromine levels, ensuring clean and eco-friendly water.
The Final Product (Almost!)
So, after months or work, hundreds on emails and messages, what is the status of this build. Well you can see for yourself below!
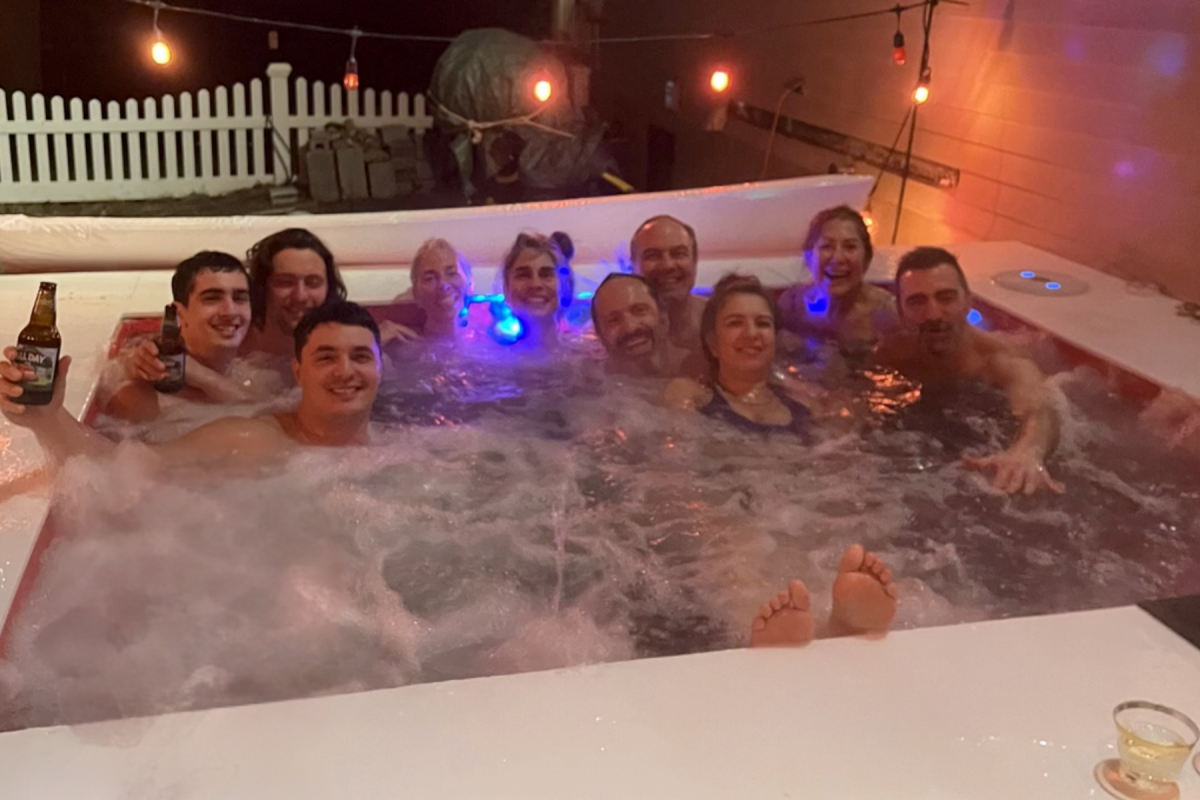
While not completely done and the interior tiling is still remaining, you can see that Paul and his family have got the chance to get in and enjoy this hard earned hot tub.
Paul will get to the interior tiling once Spring comes around so there’s going to be another update on this blogpost in a few months on how he ferries with that.
Lessons from Paul’s Journey
As with all kinds of builds, there’s always a few takeaways that anyone can find useful. With regards to Paul’s build. here are some important lessons.
- Teamwork Makes the Dream Work: The family effort made this project even more rewarding.
- Perseverance Pays Off: Despite obstacles, Paul created something incredible.
- Planning is Key: Careful planning from start to finish ensured success.
Inspired to Build Your Own DIY Hot Tub?
If Paul’s story has inspired you to start your own DIY hot tub or plunge pool project, I’d love to help! Whether you’re just beginning or need advice on a specific step, don’t hesitate to reach out.
looking for hot tub & pool parts?
I have everything you need....
If you are looking for Hot Tub & Swimming Pool Parts, either for your DIY Hot Tub, plunge pool or swim spa build, or you are looking for parts to repair your pool or hot tub - then check out my USA & UK stores below.
I carry 30K+ product lines across the stores
![]()
Can I Help You?
If I can help you in any way I would love to hear from you. You can get in touch using the form below.
Thanks - Andi
 Hi, Andi here. I own Buildahottub.com and also write all of the articles and info pages on the site. Some years back now, I built my own hot tub but struggled to find the information I needed. So, once my tub was complete, I started this website to help others in their own pursuit of hot tub and plunge pools DIY building information.
Fast forward to 2025, I've helped over 1400+ DIY customers just like you all over the world build hot tubs and pools. Have a good look around the site, there are lots of resources here. Please do get in touch if I can help you. - Cheers, Andi
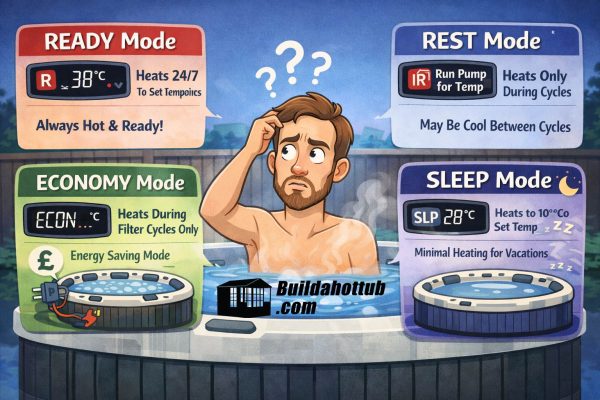
Balboa Heat Modes Explained: Ready, Rest, Economy and Sleep — What They Actually Mean
If you've got a Balboa-controlled hot tub and you're not sure what all those heating [...]
Mar
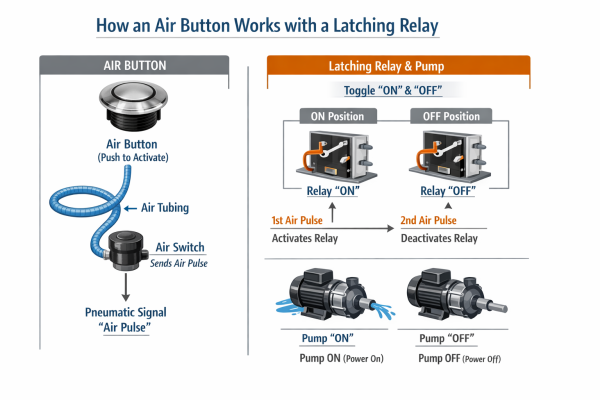
How to Change an Air Button and Latching Relay on a Hot Tub, Pool or Spa Bath
If you've got an air button that's stopped working, or a latching relay that's given [...]
Mar

How to Choose the Right Air Source Heat Pump for Your Hot Tub or Pool
With so many air source heat pumps on the market right now, choosing the right [...]
Mar
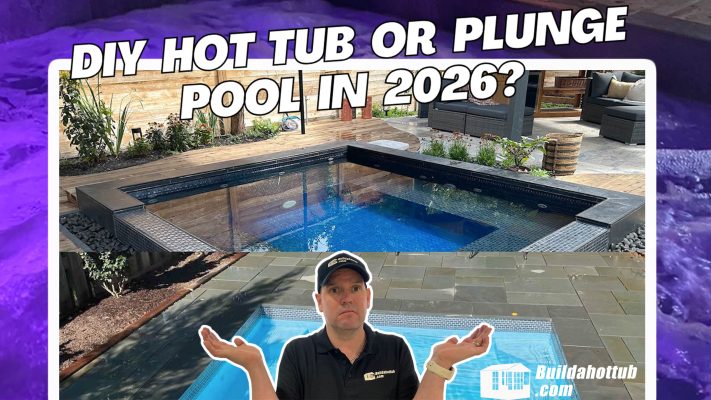
Hot Tub vs Plunge Pool – Which Should You Build in 2026?
Right, this is one of those questions that lands in my inbox on an almost [...]
Mar
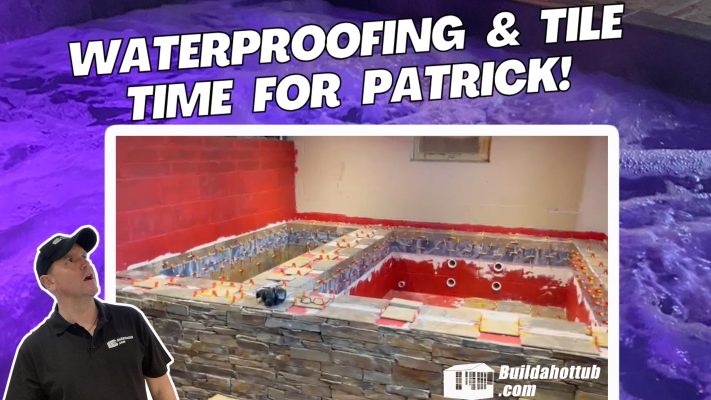
Patrick’s Wisconsin Basement Hot Tub & Cold Plunge – Waterproofing, Tiling & a Surprise Water Feature!
We're back with another update from Patrick in Wisconsin, and this one is a big [...]
Feb
Key Considerations for Building a DIY Hot Tub in 2026
So, you're thinking about building a DIY hot tub in 2026? Well, you've come to [...]
Feb
The Kansas Craftsman Who’d Never Built a Hot Tub (Until He Built One Better Than Most Pros)
Sure, he'd built plenty of things. Deck? Check. Workshop? Done. Custom furniture? No problem. But [...]
Dec
DIY Hot Tub and Cold Plunge Build: Patrick’s Wisconsin Basement Project Update
Building your own hot tub is an ambitious project that many homeowners dream about, but [...]
Sep