PVC Solvent Weld Joint – establishing if you have a good one is easy – it doesn’t leak! In this article, I will explain what steps you need to take in order to ensure that you have the perfect PVC Solvent Weld Joint. I also have a vide on my YouTube Channel.
Hot Tub Plumbing
Whether you opt for rigid pipe or indeed semi-flexible (as it is not that flexible in reality) pipe, you are going to need to make some solvent weld joints. This is true whether you are building a new hot tub from scratch, adding and air source heat pump to your existing hot tub, or just doing some repairs. Below I cover all of the steps needed to ensure that you have a perfect joint, each time, every time.
Cutting the Pipe
The fist step to getting a perfect PVC solvent weld joint is cutting the pipe correctly. By correctly, I mean cleanly and I mean perpendicular to the pipe itself. Your cut should be straight and as perfect as you can get it. A good test for this is if you stand the pipe up on its end, is it vertical or is it tilting to one side? If it is tilting, it is not a perfect cut.
This is important as all of the pipes at some point will need to go into a fitting or connection. If the pipe is not cut perpendicular, then you will have one side of the pipe that makes a good joint and the other side of the pipe that does and will leak.
A joint made well doesn’t leak – a bad one, will.
Cleaning The Pipe
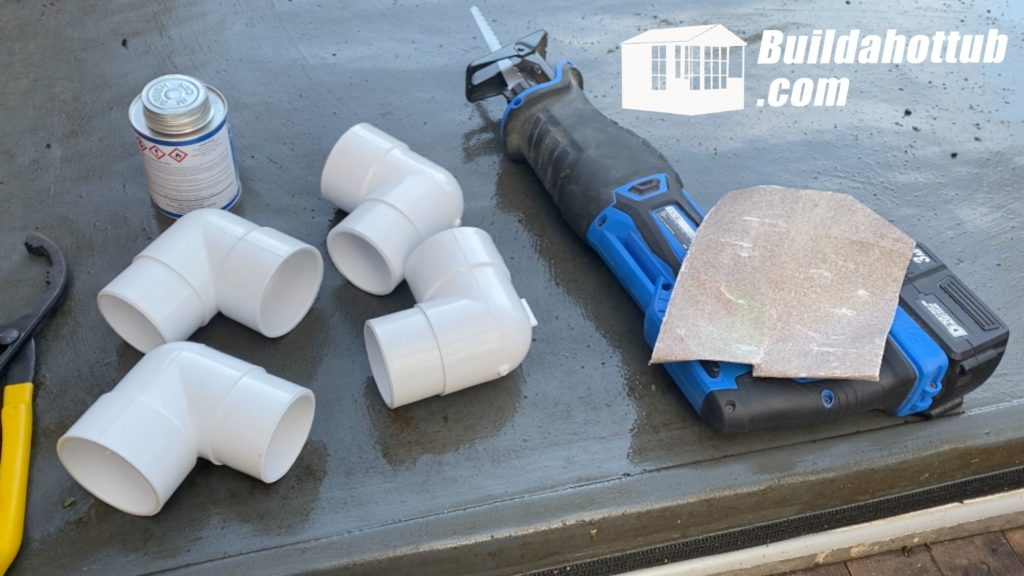
The second step to a perfect PVC solvent weld joint is that the pope is clean. By clean I don’t mean it is not “dirty” what I mean is that you have removed any of the grease and residue that has been left behind from manufacturing. This is especially true if you are using the semi-flexible pipe.
To do this, you are going to take a piece of glass or sand paper and you are going to rough up the edge to about 2” or 4cm in length. This is enough for the joint that you are going to make. You know when it is “clean” and has been roughed up enough when it is no longer shiny and it is a sanded dull colour – this is perfect.
Priming The Pipe
This is a somewhat optional step, but priming the pipe is the stage where you use a solvent based PVC pipe primer. This is often purple in colour. What the primer does is it too removes and dirt and grease from manufacturing process.
Personally, I tend not to use a primer and just make sure I have thoroughly roughed up the area before I apply any pipe cement to the pipe.
Cleaning the Fitting for a PVC Solvent Weld Joint
This next step is exactly the same step as you have just done with the pipe itself. You are going to take a piece of glass or sand paper and you are going to rough up the inside of the fitting 2” or 4cm in length which should take you up the internal “line” inside of the fitting.
The goal is to get the pipe into the fitting right up to this line on every single joint.
Marking Your Pipe Depth
This next step is one you should not miss out. With a permanent marker or a sharpie, you are going to mark the ideal “target” depth of the pipe that you would like to get it inside of the fitting.
To do that, hold the pipe alongside the fitting and liik for the internal line inside of the fitting. This is the maximum depth that the pipe can go into the fitting before it hits the small “lip”.
With your marker or sharpie, mark this depth on the pipe. This is the “target” as it can get confusing very quickly with how much pipe has actually gone inside of a fitting once you have done 5 or 6 you will forget!
It is also a good thing here to actually add a couple of guide marks for alignment. What I mean is put the fitting in exactly the right angle you are looking for an then put a mark on the pipe and on the fitting. This will help you align the two when you are in somewhat of a rush below.
Applying Solvent Weld
This step you do need to do quickly but don’t rush. You have about 20-25seconds before the solvent weld becomes unworkable and has dried.
Apply a good amount of solvent weld to both the pipe all the way around and the fitting. Not too much that it is dripping everywhere but also not too little that there are dry sections. Then move onto the next step.
Avoid Channelling on a PVC Solvent Weld Joint
Channelling is where you push the fitting onto the pipe and the solvent weld dries in a straight line leaving a dry patch. This channelling can lead to leaks. Therefore, what you are going to do for each of the joints is twist the pipe and the fitting when you are pushing them together. This twisting action means that you can avoid the channelling.
This is also where those guide marks that you made come into place. Firstly, you want to try and get to your target line which means that the pipe is fully inside of the connection. Next, so you don’t have to worry if your joint is at the right angle, you are going to align up the two marks you made on the fitting and on the pipe itself.
Easy right?
Wipe off the excess
There will of course be excess solvent weld on the pipe and the joint so it is good practise to use a microfiber cloth and just wipe off the excess all around the joint. It should be clean, no visible gaps and at this point, the solvent will have started to dry.
There is enough strength in the weld after 20mins for running water through under pressure and it is 4 hours until it is at its full strength.
What to do if it goes wrong
What do you do if it all goes wrong? This step is simple. Cut it out and start again. Do not try and patch up a bad joint, it will leak. Don’t try and plug a bad joint, it will leak. If the joint is not made well in the first place, you guessed it, it will leak.
PVC Solvent welds when done correctly last for almost ever. If they are not made correctly, they will leak in the future if they don’t already do so now.
A bit of practise and you can become very good at these quickly.
Happy Hot Tubbin’
Can I Help You?
If I can help you in any way I would love to hear from you. You can get in touch using the form below.
Thanks - Andi
 Hi, Andi here. I own Buildahottub.com and also write all of the articles and info pages on the site. Some years back now, I built my own hot tub but struggled to find the information I needed. So, once my tub was complete, I started this website to help others in their own pursuit of hot tub and plunge pools DIY building information.
Fast forward to 2025, I've helped over 1400+ DIY customers just like you all over the world build hot tubs and pools. Have a good look around the site, there are lots of resources here. Please do get in touch if I can help you. - Cheers, Andi

